Sunday, February 23, 2014

Life is a Journey

An Adventure. And I am the Hero. 

Or so I am told. That is a thing of which I still need to believe.  And apparently [out of some 200 participants], so do others who have embarked and set sail upon the heroic seas of Suzy's [Wool Wench] and Arlene's [Spin Artiste] adventure to Fibery Goodness, and quest for a Golden Fleece

Upon reading similar concerns, and joining the conversations of other fellow travelers, whether in the Fibery Goodness Forum, or on Facebook, I am not alone in feeling overwhelmed. I am not alone in questioning my want, or lack thereof, in looking back upon my life. Been there. Done that. And I am far from alone in pondering where to actually Begin. 

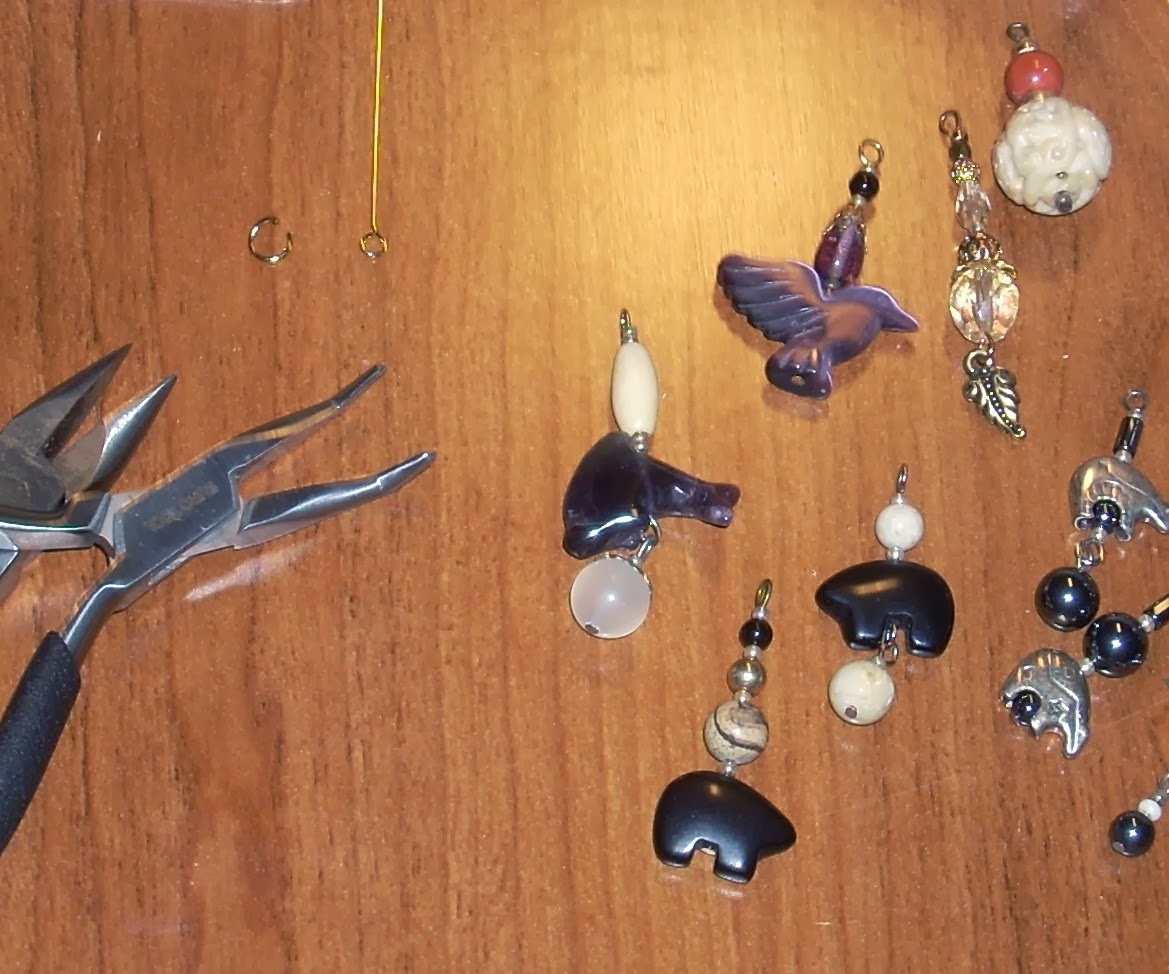
Module One Collection
With Module One came instructions. I started collecting. Tools. Fiber. Things. Memories. I even created a specific Module One Pinterest Board.  And boy, was I stubborn about wanting to do the Pinterest Thing.  I simply looked at it as one more media site I would struggle with keeping up.  But--- Resistance is Futile. I so get it now. And so wish I'd gotten on board sooner. 

Here's a link to my Inspiration Board created when the first group signed on.

Said crew is looking a tad perplexed!
I downloaded my Coloring Book, but had to wait until I could get out and about for new ink cartridges.  I printed off one page, though.  My little ship.  The print was so pale I had to re-color all of the black outline. But once her sails were unfurled, and my crew was On Deck, my little ship was upon its way.

With Module One came questions. And as indicated earlier, I struggled with where to begin.

While I am a strong believer in the unwavering ability of one being able to influence the choices of another, whether for good or bad, this specific choice is purely mine. Truly one that no one else can make. And in trying to answer just the first two questions, and my entire reason for writing this post, I have come to understand that my Adventure [for now. I reserve the right to invoke "A Woman's Right to Change Her Mind" prerogative. (Yeah--- That's the ticket! That's my Story. And I'm stickin' to it.)] is more about rekindling. A reclamation of sorts. And a Call unto its own.

I know now that my Adventure began when--- After becoming physically disabled, and spending time Mourning the life I no longer had: Hiking; Wildlife Photography; Gardening; Working for a Living to maintain a roof over my head; and more--- After determining the need to downsize and questioning why certain of things I continued to hang onto for decades--- I determined to reclaim a time in my life. One that I sorely missed. 

I pulled out a little drop spindle and painted it. [I so wish I had taken a Before photo, because it was not very pretty. But it had been a Gift.  And so was Kept.] 


It had been so long, and I wasn't quite sure of myself, so I started to surf YouTube for videos on hand spinning. I eventually found a burgeoning community of fiber people on Facebook. My Adventure had thus begun.

Click on the images for larger view options
I won a bag of assorted wool fibers upon entering a Facebook Page contest [I had the makings of a Stash], and I started to spin. 

It takes me FOREVER to get anything accomplished, because I simply cannot sit at it for long stretches at a time. So I am QUITE grateful that the course requires only a few meters of yarn, for each module, and not a 4 oz. skein. Because, where someone can spin up a fantastic skein of fibery goodness in a day, over a weekend, it can literally take me WEEKS.  Months, when frustration and periodic Recovery Modes set in.  But--- I have fallen in love with all these new artsy batts and yarns. [No such thing when I first learned to spin.] And I have YouTube and Facebook, and all of these wonderful inspiring artisans I've met, over the last few years, to thank. So--- Thank You!

But--- I'm not totally sure that THAT's even where my new Adventure truly begins.  Because what REALLY changed what I saw myself doing, was the Facebook photo album Suzy [Wool Wench] shared of her using an old drum carder gear to weave shields.

OMG! I mean, O. M. G!!! I finally knew just how I could use my little hand spun Torn Denim skein.  Lights went on. Bells rang out.  THIS I could DO.


And this is what actually leads back to the REAL reclamation I was in the midst of [some eight years ago]; just as everything physically all went very wrong. Navajo Rug Weaving. Where my Adventure in Fiber truly began [literally decades ago].


Younger Me weaving outdoors.
I'd been pricing lumber online, and researching Navajo weaving supplies and resources.  I was going to build a new floor loom. 

But multiple ruptured discs, a lower spine riddled with Osteoarthritis, another disc made bad during physical therapy, Fibromyalgia, and yada, yada, yada y-e-s there's more---- (Heavy sigh!) It was with a great reluctance that I eventually put my books and measurements and pricing away.  I deleted bookmarked resources. I was not going to be weaving any kinds of rugs. 

But what's that old adage about Hope springing Eternal? 

Younger Me weaving indoors.
Back in February of 2013, Natalie Reading [Namaste Farms] hosted a Blog Talk Radio show featuring Lynda Teller Pete [a Two Grey Hills Tapestry Weaver] . Her interview and weavings rekindled my desire; once again.

The loom she teaches on reminded me, that like quilting--- I did NOT need to quilt an entire full sized bedspread to get involved in quilting. I could start small; with a wall hanging or pillow top.

I can no longer sit on the floor and attempt to weave in front of a large loom.  But, graciously, I realized that I could build a much smaller one, kept set upon a table top, and weave in tapestry.  So I had THAT mulling around quietly inside my brain matter for months. Thank you ever so much, Lynda Pete!

Auditioning possibilities
Enter the Drum Carder Gear loom, a large metal ring, and my small skein of hand carded raw ginned cotton and a Mystery Wool--likely a merino/silk blend.

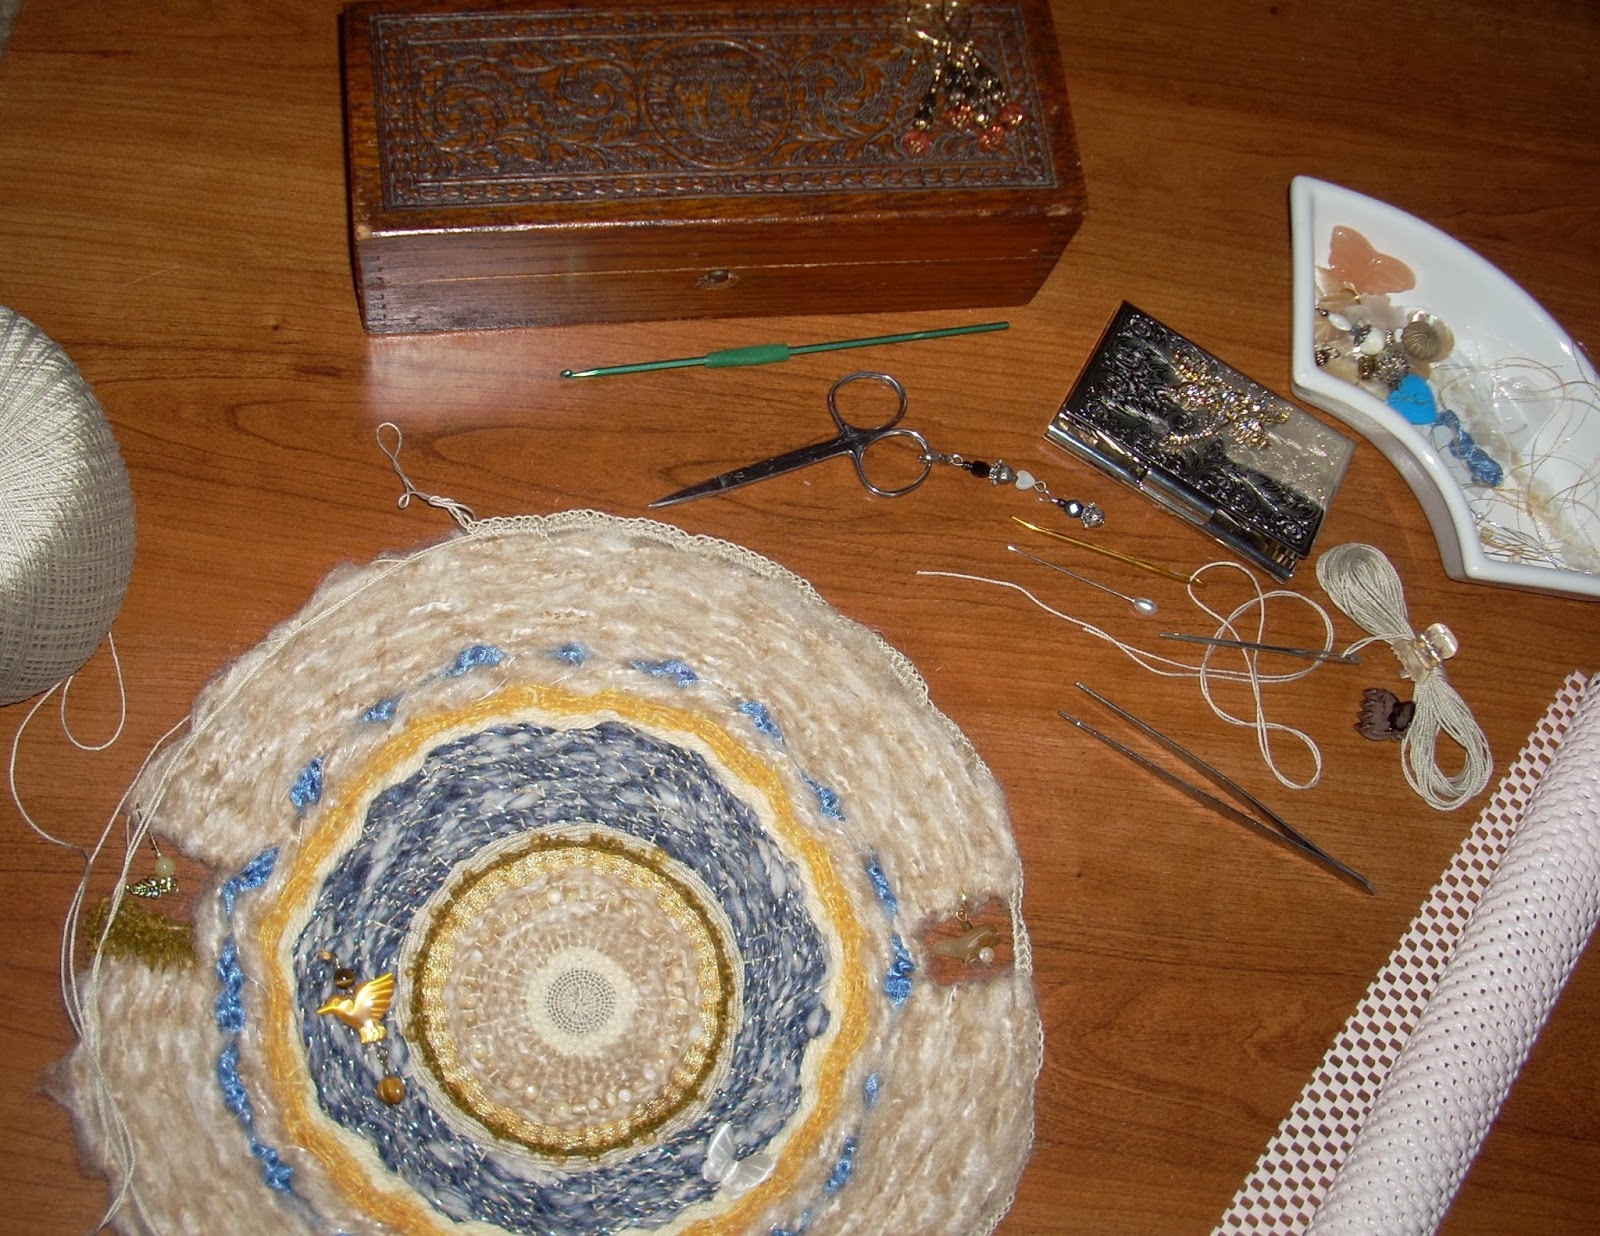
For months after discovering Suzy's circular weavings, I wracked my brain trying to figure out how I was going to make it work with something I already had on hand [without spending any kind of money; due to living on a very limited (SSD) income] --- a stash of metal rings.  Perfect.  A pre-mounted wall hanging.  I did sque-e-eeze in a small purchase of some beautifully hand dyed 100% Mohair Boucle from Grace Gerber's etsy store [My jaw dropped when I saw her update of all those little skeins of boucle--I so wanted to buy every last one!], in anticipation of my first real weaving.

My first real weaving
And one weekend, not so very long ago, when all things were right, I determined how I was going to make Suzy's shield weaving work for me---- I  pulled out my large metal ring, and went about gathering other fibers to audition.  But when I opened the door to my studio closet [where my commercial yarns are stored]--- right in front of me was my large yellow round Knifty Knitter loom; hanging by a ribbon looped over a hanger.  


Pegs. Gears. Removability.

"Pick Me! Pick Me!" it screamed.  It took a few tries to figure out the right warping, but soon I was on my very merry way.

On that very same weekend, Arlene and Suzy posted a sneak peak of their Fibery Goodness launch. "OMG!" I was thinking, "What pure Synchronicity."  Truly one of those Come-On-Universe! Open-Up-and-Give-Me-A-Sign moments.  I sent them both a photo of what I'd been up to.  And while the Majacraft Loom is yummy pretty, my humble little Knifty Knitter Loom was long ago bought and paid for... No Math required there.  I could WEAVE!

So--- I do believe that my Turning Point is more in the Here and Now.  But--- I know there will be a bit of Looking Back involved.  Because a part of my Creative Spirit died Way Back When. And I know we are defined by our Past. But, what's done is done, comes to mind as I write this. And some things ARE better left where they lay. But I am very open to new discoveries.  And maybe, just maybe, a key to a possible future is buried in a treasure chest of the Past.

My Captains Quarters
Wow!  All this--- and I haven't even read all the questions. Yet. But then I'm still collecting. Fiber. Photos. Print outs. I'm still getting a hard copy Journal going. I started coloring my Module One Shield just last night.  I made ready my Captains Quarters, and fiber preparation for my Module One Yarn is currently begun. 

I'm looking forward to sailing the virtual open seas, and discovering what uncharted Creativity holds in store.  And though I am the only Captain at my helm, I know I am not traveling, or waffling, or struggling alone.   The open seas are not always calm.  But I am not the only ship set sail. 

Module One Yarn Preparation
OK! I've babbled on long enough.  I've more coloring to do, and there are words that are yet to be read. Plus I've a roving what needs plucked of unwanted golden tinsel. 

Happy Sailing to my Fellow Captains.

Blessings~


Saturday, February 8, 2014

To Curl or Not to Curl----


What is the Answer?

"Whether 'tis Nobler in the mind to suffer
The Slings and Arrows of outrageous Fortune,
Or to take Arms against a Sea of troubles,
And by opposing end them?" ~William Shakespeare

OH! Yes. Yes, yes. By all means we need to end them! The following question has been posed to me on more than one occasion: "How do you stop the edges from curling in?" 

I understand it is a frustrating issue.  But it is one I believe that is easily resolved. Regardless whether you are weaving on an old drum carder gear; a Knifty Knitter loom; that pretty wood one, from the world down under, currently sailing the heroic seas of Facebook; a hula hoop; a paper plate; or a circle cut and notched from cardboard, getting the tension right, in any form of weaving, is a bit of trial and error at first.  Especially when you are working with new or unique fibers, techniques, and/or looms. 

I thought I would craft an answer with two things that should be considered both before and throughout the weaving process:  1)-- The Yarn You Choose for the Warp; and 2)-- How You Weave with the Weft, which has the potential for the Double Whammy!

To answer the question as it relates to Warp, I'm going to throw a bit of Physics into the mix. To be more precise, Newton's Third Law: For every action, there is an equal and opposite reaction.
 
Graphic courtesy the Internet
"That's a stretch." You say? [Pun intended!]

Well then what about that old Newtonian adage regarding things what go up.  You know?  Those things that inevitably find their way back down?

Unless you are working with cotton rug warp, mercerized cotton, a linen, or another fiber with little to no give or stretch, depending on the crimp or sponginess of a handspun, the premise actually translates rather well to the world of Fiber Arts: Memory.


What stretches out, has the potential to ease back to its former state.


Graphic courtesy the Internet
A LittleWeaving 1.0

Weaving involves two sets of threads.  The Warp and the Weft.  The Warp threads are the very foundation of any given project and are maintained by a fair amount of tension, regardless the style of loom.
______________________
When choosing the yarn [or thread] you want, or need, to achieve the desired result--- be mindful of choosing a handspun with a fair amount of give.  Because once you remove your weaving from the loom, your warp will likely do what it can to return--bringing the outer edges with it--to its natural state.  Something to be considered as you pull your fiber of choice taut while warping your circular loom.

To problem solve whether that might be a factor, unless it was so obvious at the time, check the finished diameter of your weaving against the inner diameter of your circular loom [knowing your stopping point], and then see whether, if at all, it shrank in size.  

Laura Abbott, HeartSong Studio
The following examples show a piece just after being removed from the pegs of a Knifty Knitter loom. The warp thread used was 100% Cotton. There was little to no discernible draw back after the overall tension was released.

[Right Click and chose to Open in a New Window or Tab for a larger view.]


Laura Abbott, HeartSong Studio


To answer the question as it relates Weft, those who are already familiar with traditional weaving know that if you pull your Weft yarns too tight it causes the salvages to pull in.  And there are two methods that can remedy that situation, depending on whether you are weaving on a floor, rigid heddle, or tapestry loom:  1)-- Lay your weft at an angle [45 degrees to start]; and 2)-- Lay the weft in an arch, or series of arches. 


Let's consider that the outer edge [or rim] of your circular weaving is the salvage.  If you draw your weft through and around too tight, you end up with an insufficient amount of weft [a loss in your circumference] for a proper woven round.  


A Little Weaving 2.0

courtesy wiseGEEK
In a good balanced plain weave you want your weft to rise and fall, going over and under the warp threads with ease.  You want to see a cross section of defined scallops in your weft.
 
 
Weaving 2.1
The Double Whammy! 

While you are weaving, if you pull your weft too tight, and your fiber of choice has a fair amount give, then there are two things that can happen as a result: 1)-- You will lose the proper amount of yarn needed to weave a balanced round; and 2)-- Memory. Your yarn has the potential to return to its natural state once your weaving is off the loom, and the overall tension is relaxed.

_______________________________________________________________________ 
What's Beans Got to do With It?

For anyone who likes analogies:

If you do any sprouting--- some people cut cheese cloth and secure it at the opening with a rubber band instead of a purchasing or using store-bought sprouting lids.  If you remove both the cloth and rubber band together, the cloth will pucker as the rubber band relaxes.
 
_______________________________________________________________________ 
From Ask Madelyn:
You can always tell if you do need to adjust the weft angle, though, by noting whether or not some of the picks are causing too much draw-in. In that case, you'll want to use a steeper angle. If the angle has to be especially steep (as for wide, weft-faced pieces), you'll need to bubble [an arch] the weft to make the distribution of the yarn consistent across the width of the warp. 
Laura Abbott, HeartSong Studio
From Needle Weaving on a Circular Loom:
Here is where you will want to modify how much of an arch you work with as you pull your Weft Thread through and around.
I mention this further in A Little of This-N-That. You do not want to see the warp threads leaning one way or the other; depending on which direction, or by what hand you weave.  If you start to see any distortion of your warp threads, you are likely pulling your weft too tight. 

It is so easy to do as the warp threads radiate further apart, and you progress toward the outer edge, or rim of the loom.  You want work with an arch [or scallop], and ease the weft into place, whether by doing so using your tapestry needle; a small tapestry comb; a wide/large tooth hair comb; or by a fork.

_______________________________________________________________________
 Bottom Line?
 
It truly is nothing more than learning and/or understanding how your fibers of choice, whether commercial or handspun, are going to respond or retract after you remove your finished weaving from your loom. 
 
Laura Abbott, HeartSong Studio
YOU DO NOT want to pull your weft yarn straight across, and/or give it a bit of a tug.  Actually--- it's OK to do that in the very first few rounds, as you work to even out the warp threads around the center knot.  But after that, you need to detemine the appropriate arch for your fibers.
 
What the weft angle must accomplish is to allow enough give in the yarn to make the over-and-under interlacement with the warp that the weave structure requires without pulling in the edges of the cloth once tension is released. The wider the piece, the more actual inches of "extra" weft will be required. If the piece is weft faced, more "extra" is required than if the structure is plain weave.
To problem solve whether your weft is too tightly woven, lay your circular weaving in front of you.  Get the bottom portion flat, and then slowly move your hands up and around either side [working to keep your piece flat], and if you see a bulge forming around the upper rim---  If your piece did not shrink back in size due to a stretchy Warp thread--- then it is possible your Weft is too tight.  And if there was any stretch to the Weft yarn, then that may have retracted as well, making for the possibility of a Double Whammy!
 
So take a look at your earlier weavings and see what might have been the contributing factor, and don't let any frustration ruin your creative possibilities.  It's all a learning curve. 
______________________________________________________________________
Resources:

Navajo Weaving Way, by Noel Bennett and Tiana Bighorse, has a good photo on page 90; with an explanation of regulating Weft Tension on page 91.
Navajo and Hopi Weaving Techniques, by Mary Pendleton shows a beautiful example on page 44; and discusses Weft Tension on page 45.
Weaving Today -- Ask Madelyn
http://heartsongstudio2.blogspot.com/2016/02/services-rendered-wish-list.html
___________________________________________ 
Leave any questions you may have in the Comments. 
Or Facebook Friends can Private Message me.
 
Bye for now, and Blessings~
 
And Happy Weaving!


Tuesday, February 4, 2014

A Teachable Moment

 
_______________________________________________________________
Mistakes Make for Excellent Lessons. 

I thought I would share one of mine; especially since it is relative the last tutorial: Finishing Touches.

While working with all of the loose ends and wisps of tails on the back side of my Winter Sampler 2014, the mantra by which I worked, at some point, decided to take a coffee break without inviting me.

In some places I was fine with simply tying a Square Knot.  But in most I wove in the ends using either a fine gauge crochet hook, or large eye needle.


*If a picture is all you need click on the image above for a Slide Show
First off I wove in all the thread tails created while working the Beaded Round.  I have any number of vintage steel hooks from which to choose.
I simply pulled the tails through the previous rounds of weaving.  And then secondly, I checked the front side each time before I cut the thread waste. All to make sure nothing showed through that I did not want seen. 

Always. 
 
Always, always, ALWAYS!

 
Special Note: For a larger view of an individual photo:
Right Click on the photo and chose either
Open link in new tab -or- Open link in new window
 
As I worked with the Lily Sugar n Cream Cotton yarn, dividing the heavier gauge four ply into two strands [two ply each] made it much easier to needle weave the ends. Each time checking on the front side to make sure nothing showed. 
It was when I got to Gold Metallic Thread Round that the separate Coffee Breaks transpired!

*Right Click photo to choose a larger image.
Using the large eye needle here as well, I easily wove in the ends, and cut as usual.  But somehow I ended up sidetracked, or disengaged.
This is what I did; which seems just fine from this vantage point. [See Graphic above.]  But I forgot that this was the back side of the Bullion Round.

This is exactly what I did not want to see.  The Bullion Round offers absolutely no coverage.  I managed to do the double check.  My mistake was in not doing so before I took the final action.
 
So?  Always, always, ALWAYS! check the front side of your weaving before you cut your thread waste on the back side.


I'll fix it.  But I'll have much shorter ends from which to do so. And it will mean I'll likely take a needle and thread and hand stitch them into place.
 
Mistakes are but one valuable way in which we learn.  They can, at times, make a process frustrating.  But they always have the power to make us grow.  Always.
 
http://heartsongstudio2.blogspot.com/2016/02/services-rendered-wish-list.html
___________________________________________
Leave any questions you may have in the Comments. 
Or Facebook Friends can Private Message me.
 
Bye for now, and Blessings~
 
And Happy Weaving!

Wednesday, January 22, 2014

Finishing Touches

 
 Moment of Truth!
 
Welcome to the last installment of this series of tutorials for Needle Weaving on a Knifty Knitter loom.  This module will focus on:
 
Embellishments
Bind Off Options, and
Securing Loose Ends.
 
Time to Take Your Finished Project Off the Loom.

*If all you need is a photo, click on the image above for a Slide Show.
 
Well---  First let's go over how you can embellish, assuming you wish to do so, before you take your weaving off the loom. 

Think of it as somewhat similar to working with a piece of fabric in an embroidery hoop.

Embellishments can be anything from beadwork to felted flowers to embroidery or free form sculpture.
 
The example below shows a hand-carved novelty bead sewn into place. 
 
 
Special Note: For a larger view of an individual photo: 
Right Click on the photo and chose either
Open link in new tab -or- Open link in new window

 
If you do any kind of beadwork, you likely have a stash of all kinds of trinkets, fobs, and/or charms just ready and waiting to be used.
 
 
Here is another option for sewing a beaded embellishment into place.
 
 
If you've left openings in your weaving [a design factor of choice] ....
 

Pull out, or shop for, the appropriate findings,
 
 
gather your tools,
 
 
 and simply make sure you catch a Warp Thread inside the jump ring before you secure it in place.
 

_______________________________________________________________ 
Time to remove the hair clips. 
 
Remove any hair clips from the back side so that your piece will lay flat once it is off the loom.
 
 
 _______________________________________________________________ 
Off Loom Edging
 
Prepping an Edging Thread

Here is an option that will make a nice base for a crocheted edging. 

The example below works with the same cotton thread used to warp the loom.

You will need a blunt tip tapestry needle, and an appropriate crochet hook for the weight of thread you choose to use.

 
Cut a new thread measuring twice around the outside edge of the loom. Leaving enough thread ends to tie on and off, and weave in.  [See example from previous tutorial: A Little of This-N-That
Tie on the new thread at the Tie On/Off peg [1L], using a Half Hitch knot.
 
This technique will run the thread around the outside edge of the loom, and will take a stitch through each Warp Loop.
SPECIAL NOTE: Keep the functionality of your piece in mind,
as you can chose to go once or twice around.
 
 
Work around the loom, running your tapestry needle through each Warp Loop. 
 
 
As you pull the thread around, keep the same SPECIAL NOTE in  mind that you learned while weaving.  Do not pull the Edging Thread overly tight.
 
 
Another view. Different angle.
 
 
Again, the weight/gauge of the thread you are working with, and the overall functionality of your piece, will be your factor for going once or twice around. 
 
Tie off at the Tie On/Off Peg [1L].
 
This is also the time to untie your initial Tie On/Off Warp Threads, and secure everything with a new knot.
 
 
The example above shows that the thread went around twice.
_______________________________________________________________ 

True Moment of Truth
 
Time to Take Your Weaving Off the Loom
 
It is now time to remove the loops from the safety of their respective pegs.
 
You can use whatever tool you find most comfortable working with to pop the Warp Loops from the pegs: your KK loom hook; a pair of bent tweezers; your fingers; etc.
 
Below is an example of how your Warp Loops and Edging Thread will appear just after removing your weaving from the KK loom.


Right click on image for larger view
 
If you chose to not run this Edging Thread, you can chose to leave the Warp Loops as they are.  It is all about options. 
 
Or you can crochet a set amount of single crochet stitches [or double crochet---the design options are unlimited], and then chain a similar set amount of stitches to the next Warp Loop.
 
 
The example below shows 8 stitches in each section.
 
8 single crochet stitches inside each Warp Loop.
8 single crochet stitches in each area in between.
 
 
Depending on the weight/gauge of your warp yarn [or thread], there will be a period of trial and error until you determine just how many stitches are necessary for the look you want to achieve.


 And you can decide how many rounds to crochet to achieve your design goal.
 
 
The example here shows three rounds of crochet.
 
_______________________________________________________________
 On Loom Edging
 
This option is simply a matter of crocheting the first [or only] round of single crochet stitches while your piece is still on the loom. 
 
It is much easier than it might look. 
 
And it is perfect for bulkier or lofty handspuns or novelty yarns.
 
 
Measure enough Edging Thread for once or twice around; in the same manner as documented above.
 
Tie new thread onto the Tie On/Off peg [1L], using a Half Hitch knot. 
 
 
Close up view.
 
 
Run new Edging Thread around the outside edge of the loom, in the same manner as described above.
 
 
Again, depending on the weight/gauge of the thread, AND keeping functionality in mind, you can choose to go once or twice around.
 
Tie off with a Half Hitch knot at the Tie On/Off peg [1L].
 
And again, this is a good time and place to untie your Warp Threads, and get them ready for one clean knot.
 
Collect all loose ends and do a quick half hitch knot around the Anchor Peg.
 
 
Choose the appropriate crochet hook and using a Single Crochet stitch, crochet as many stitches as needed in between each peg as will help your piece to lay flat once it is off the loom.


3 Single Crochet stitches were used in this example. 


Close with a Slip Stitch. 
 
And then weave in the ends.


Untie the threads from the Anchor Peg.
 
  
Remove any hair clips from the back side. 
 
 
Gather up the Warp and Edging Threads, 


And secure temporarily with a Hair Clip. 
 
 
Your piece is now ready to remove from the loom. 
 

Use whatever method you need, or prefer, to remove your weaving from the loom.

_______________________________________________________________
Wisps of Tails and Loose Ends
 
Time to begin knotting and weaving in and clipping loose ends.
 
 
Certain yarns can easily be woven in using a tapestry needle or a crochet hook.
 
 
Certain fibers are more slippery than others.
 
Fray Check or a dab of fabric glue can help to hold knots in place. 
 
 
Knots in 100% Mohair and certain man-made novelty yarns [i.e. eyelash yarn] do not hold very well. 
 
The Fray Check can help you feel a bit more confident.
 
 
The ruched ribbon and braided cordings will require a few hand-sewn whip stitches
 
Once the cording is sewn and cut, use either the Fray Check or glue at the ends.
 
Another option: Once you finish stitching the cording together, wind some of the thread around each side, several times, secure, and then cut away the waste. The wound thread will hold any potential fraying in check.
 
 
Weave in the Warp and Edging Threads. 


After a little bit of work, all of this--


becomes this!
 
NOTE: The example above IS the back side.
_______________________________________________________________
Congratulations on finishing your first
Circular Needle Weaving project!
 
This concludes the series of tutorials for this warping method. 
 
 
______________________________________________________________
 
EDITED: Click here for information on finishing off the Denser Warping--Option No. 1:
______________________________________________________________
What Comes Next?
 
There will likely be an upcoming blog post to talk more on how these circular weavings can curl, along with what things to consider [i.e. knowledge of weaving techniques, choice of warp, weft tension] as regards problem solving for future projects.
 
AND, as soon as certain pieces are readied--- there will be a post regarding Mounting for Wall Hangings
 
Since so many people ask, "What is this going to be?" I'm also concerned with future ideas revolved around utilitarian functionality.  I, for one, see decorative AND functional pillows in my future. 
 
With that said, I've been working with a new and denser warping.  And I've another warping option that I want to experiment with before I put this current method out there; whether for the best or simply user option. 
 

The warping option pictured here had it's challenges.  So, I really want to play with another warping option so that those newer to weaving do not get frustrated with the process.  But-- I'll have another blog shortly going over what to expect.


__________________________________________________________________________
I trust you've enjoyed this series.  I am so looking forward to seeing what everyone is doing!
 
http://heartsongstudio2.blogspot.com/2016/02/services-rendered-wish-list.html
 
In the meantime, leave any questions you may have in the Comments. 
Or Facebook Friends can Private Message me.
 
Bye for now, and Blessings~
 
And Happy Weaving!