
 Back in the middle of March, I found a Private Message [in Facebook] from Pam Blasko [of Dream Come True Farm] , inviting me to be among several Fiber Artists to participate in the spinning of the some Romney fleece. This is the first round of hers and Virginia Scholomiti's [of The Yellowfarm] new Breed Exploration series at Shepherds Talk. The intent of this study is,
 "to work to keep the integrity and character of newly sheared fiber, with little or no processing."
Pam asked that we spin some Romney for them raw. She sent us 2 ounces, to be spun however we felt so inspired. 2 Ply, Art Yarn, Traditional, etc., Pictured to the left, are my three yarns--all spun in the grease.
~~~~~~~~~~~~~~~~~~~~~~~~~~~~~~~~~~~~~~~~~~
Spinning Romney in the Raw
SPECIAL NOTE: Click on any photo for a Slide Show
For a larger view of individual photos:
Right Click on a photo and chose either
Open link in new tab --or-- Open link in new window
 Up to now, I have never spun a yarn from
raw fleece; in the grease. Even when I first
learned to spin; back in the late 70s--early 80s. So--- while I was somewhat apprehensive,
but--- always one who enjoys learning new things, I accepted the challenge.
Up to now, I have never spun a yarn from
raw fleece; in the grease. Even when I first
learned to spin; back in the late 70s--early 80s. So--- while I was somewhat apprehensive,
but--- always one who enjoys learning new things, I accepted the challenge. First, I needed to determine which
spindle I would use. Ultimately, I chose my Little Meggie Kick Spindle [from
Heavenly Handspinning]. I then needed to decide how I would spin my yarn. While I
had not initially thought to spin three different yarns, I figured [seeing as
how it was my first time] I would spin something more traditional. With that decision though, came the idea to
work with a pre-beaded technique. Something else I had never tried.
First, I needed to determine which
spindle I would use. Ultimately, I chose my Little Meggie Kick Spindle [from
Heavenly Handspinning]. I then needed to decide how I would spin my yarn. While I
had not initially thought to spin three different yarns, I figured [seeing as
how it was my first time] I would spin something more traditional. With that decision though, came the idea to
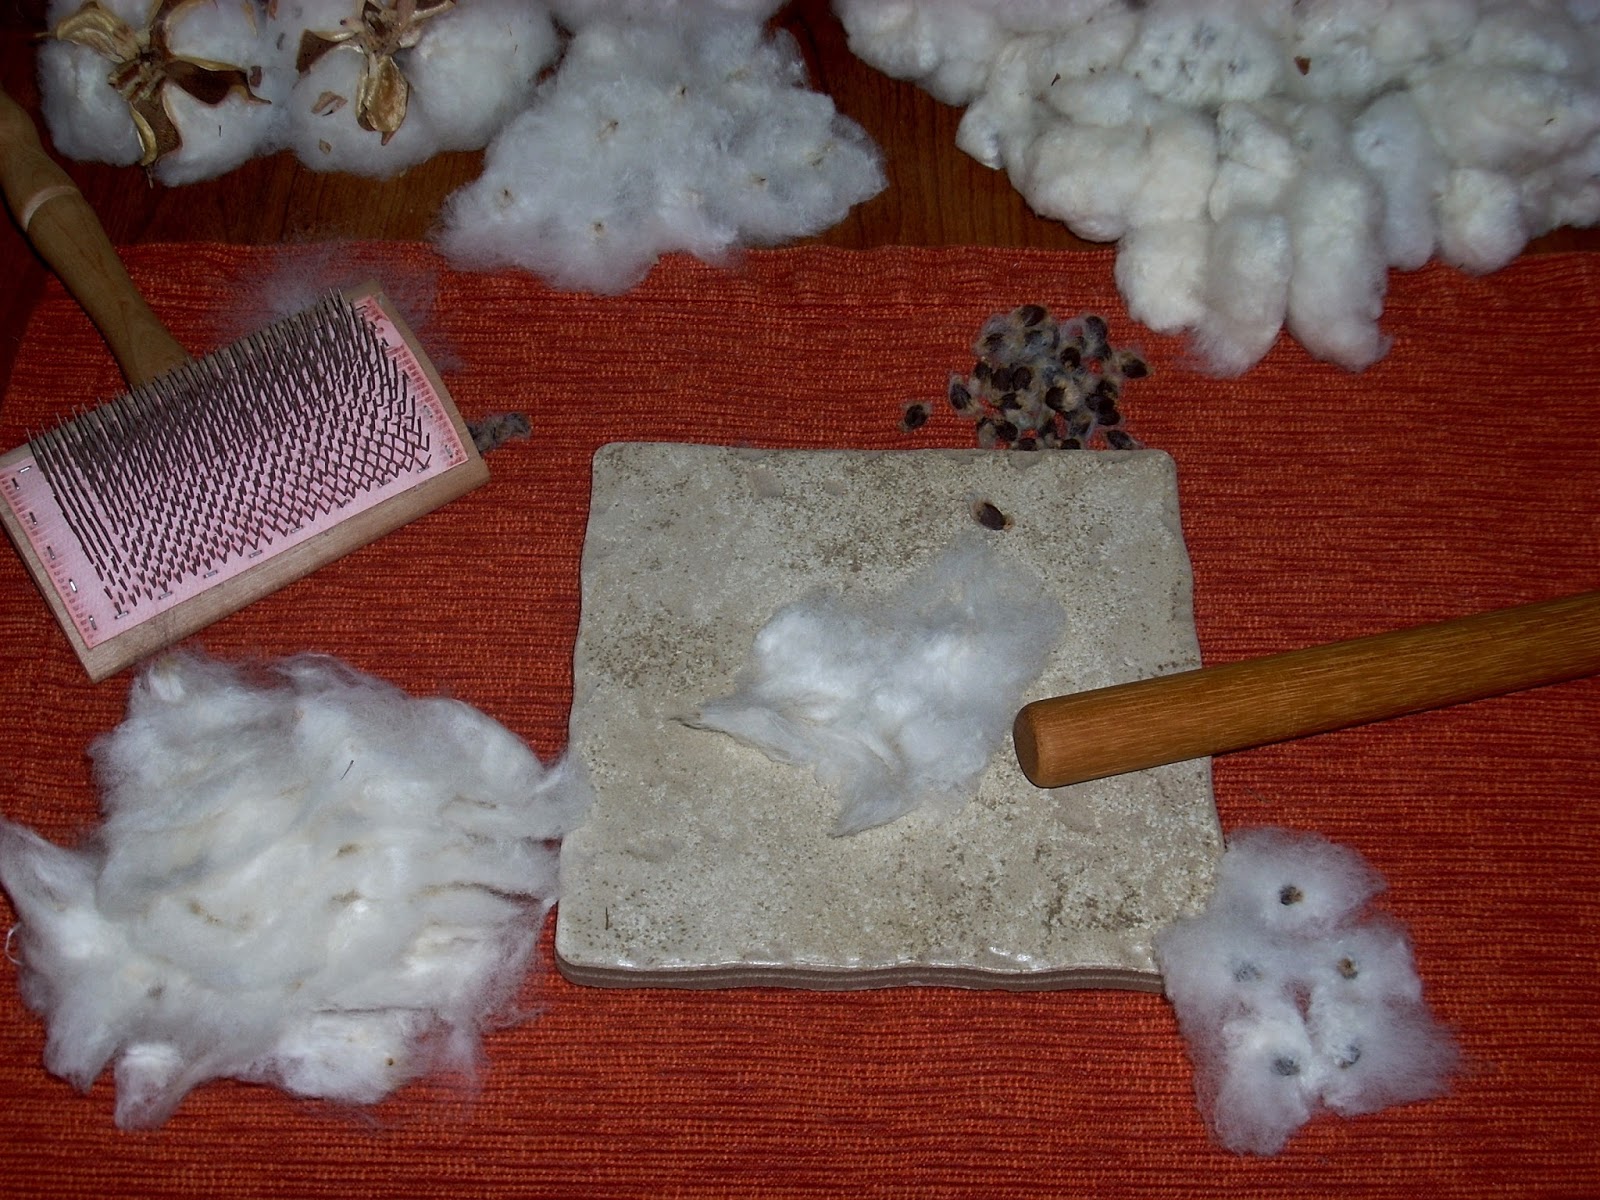
work with a pre-beaded technique. Something else I had never tried. As I flick carded the 5-5 1/2 inch Romney locks, prepping
small bits of the fiber with beads [via a crochet hook], a few questions came
to mind. That there was little to no VM, I wondered if this had come from a
coated Romney sheep. Do shepherds ever coat Romney sheep? Or--- is this
practice saved solely for the more pricy fleeces such as Teeswater and
Wensleydales? And IF so, since a coated fleece doesn't have to work as hard
protecting itself against the elements, does a coated fleece produce less grease?
As I flick carded the 5-5 1/2 inch Romney locks, prepping
small bits of the fiber with beads [via a crochet hook], a few questions came
to mind. That there was little to no VM, I wondered if this had come from a
coated Romney sheep. Do shepherds ever coat Romney sheep? Or--- is this
practice saved solely for the more pricy fleeces such as Teeswater and
Wensleydales? And IF so, since a coated fleece doesn't have to work as hard
protecting itself against the elements, does a coated fleece produce less grease?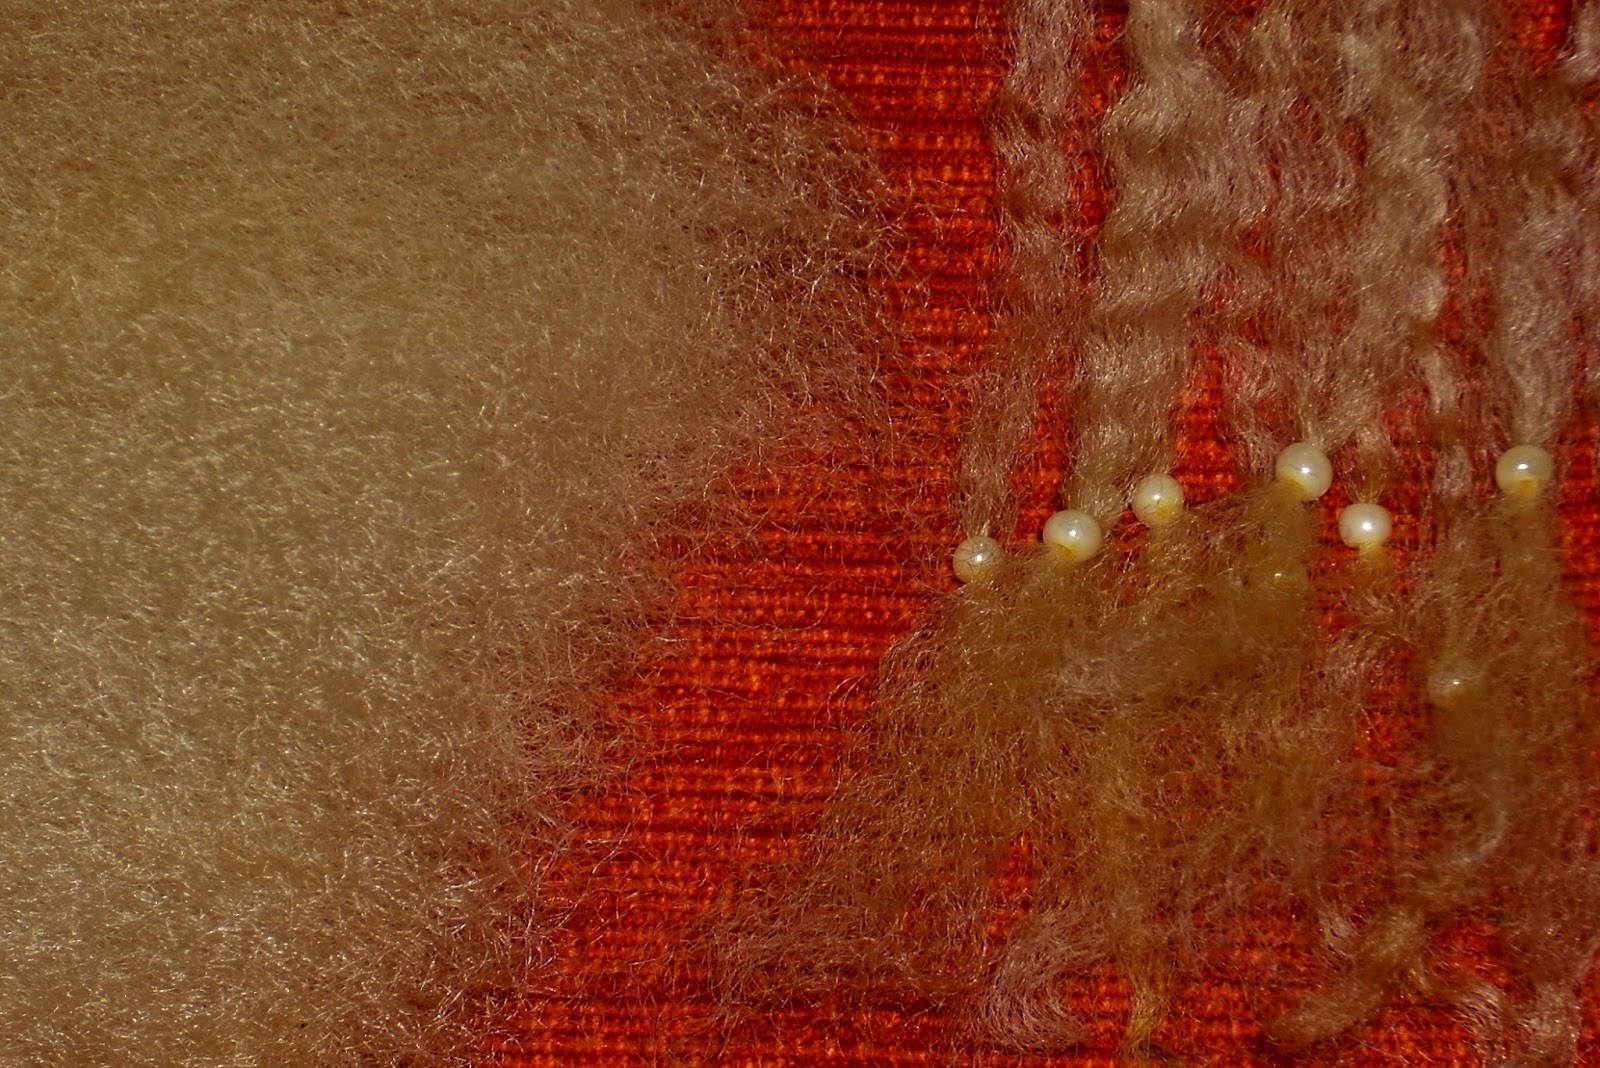

Special Note: Only after I shared my experience with Pam and Virginia,
did I see the Romney Promo video on their Facebook and Home pages
which answered my "Coated" questions.
which answered my "Coated" questions.
 I do love the feel of the lanolin on
my hands. In addition, it took a good yard or
so of spinning before I got the feel for how I would spin my yarn(s). I cannot claim that my first single was the
most perfect I have ever spun. Not only
did I have the challenge of never having spun a raw fleece, I was playing with a beading technique [a different video option] that I might have better learned with a washed fiber.
I do love the feel of the lanolin on
my hands. In addition, it took a good yard or
so of spinning before I got the feel for how I would spin my yarn(s). I cannot claim that my first single was the
most perfect I have ever spun. Not only
did I have the challenge of never having spun a raw fleece, I was playing with a beading technique [a different video option] that I might have better learned with a washed fiber.


 What I will NOT do the next time? My
plying spindle of choice, of late, has been my Navajo Spindle. While I discovered I had no real issues with
either the beads or the grease as I pulled and unwrapped from the ball, I do not believe I will opt to use this particular spindle
for future raw fleece, as the greasy yarn--rubbing along the side of my pant leg--caught
at times; slowing down my overall spin.
What I will NOT do the next time? My
plying spindle of choice, of late, has been my Navajo Spindle. While I discovered I had no real issues with
either the beads or the grease as I pulled and unwrapped from the ball, I do not believe I will opt to use this particular spindle
for future raw fleece, as the greasy yarn--rubbing along the side of my pant leg--caught
at times; slowing down my overall spin.


 |
Approximately 25 yards
|
 The second single [not quite a lace
weight] I spun straight up traditional; though many might not see spinning from
a kick spindle--- from a tabletop [to boot!]--- as being traditional. But, I found the spinning of this single very
meditative. This was a much smoother spin. And, I learned even more so with
this single, that sweaty hands and lanolin do not seem to go together rather
well. So--- there was a lot of hand washing.
But, after I got that single wound, into another center pull ball, it
was time for more plying.
The second single [not quite a lace
weight] I spun straight up traditional; though many might not see spinning from
a kick spindle--- from a tabletop [to boot!]--- as being traditional. But, I found the spinning of this single very
meditative. This was a much smoother spin. And, I learned even more so with
this single, that sweaty hands and lanolin do not seem to go together rather
well. So--- there was a lot of hand washing.
But, after I got that single wound, into another center pull ball, it
was time for more plying.
From the get-go, this yarn was
destined for plying on the kick spindle. Especially since, I had intended to do
a simple tweed effect. However--- what I
ended up doing was more of a series of little cocoons; done with pinches of Soffsilk. Either way--- I LOVE it. The tweed will just have to wait for another
day. (~:
 |
Approximately 35 yards
|

 This was going to be my fun yarn; my
hopeful Art Yarn. I both flick and hand carded the fiber, to remove what little
VM still remained, and then I handpicked the fiber into a cloud. There was a
LOT of picking going on. Once that was completed, I chose a coreless spinning
method that I learned from watching Natalie Reading [via her old Livestream videos], and
then I corespun my single. I chose a copper metallic thread with which to
ply, and--- Voila!
This was going to be my fun yarn; my
hopeful Art Yarn. I both flick and hand carded the fiber, to remove what little
VM still remained, and then I handpicked the fiber into a cloud. There was a
LOT of picking going on. Once that was completed, I chose a coreless spinning
method that I learned from watching Natalie Reading [via her old Livestream videos], and
then I corespun my single. I chose a copper metallic thread with which to
ply, and--- Voila! While I am not happy with certain sections of my plying--- that being--- having done so much spinning in such a relatively short period of time, my fingers were not working as well as when I first started, and I was finding it difficult to maintain my usual hold.
 |
Approximately 15 yards
|
Would I spin raw fiber again? From
never having done so--- to feeling a tad apprehensive--- to--- Oh, yes! Most definitely. Though, I do admit to wanting to spin a washed Romney, now, simply to experience and appreciate the difference. I also believe
that if I have another chance to spin in the grease, I would like to pull out
my wheel, and do a wheel-spun yarn for a change.
 Thank you so much, Pam and Virginia [of Shepherds Talk], for your gracious invitation. This was such a fun opportunity, and truly a pleasure. Blessings~
 Now--- as for what I might do with these yarns? While I will definitely save the Art Yarn for Weaving, I would very much like to knit a Hat Band for my old felt Winter Hat. I'll update this post, when I get it finished. In the meantime---
__________________________________________
Leave any questions you may have in the Comments.Or Facebook Friends can Private Message me.
Follow me to my Facebook Community/Studio Page @ HeartSong Studio
Bye for now, and Blessings~
And Happy Weaving!


